Thursday, October 27, 2011

{tricky trick-or-treaters: a how-to}

Happy Halloween!  Cooler weather is heading my way and I'm so excited!  I'm ready to decorate the Christmas tree but I really need to enjoy Halloween first.  It was never my favorite holiday and so I was in the habit of rushing it . . . until I had little boys.  They loved all things frightening and fearsome.  They were also terrible pranksters.
My own little tricky trick-or-treaters!
{India . . . She dressed up as a princess every year for 10 years! I have loved it all.}

My mischievous little kids really helped me learn to enjoy Halloween.  Once that happened, I started getting ideas.
Now trick-or-treaters are a real treat at my house!

Oh, how my boys were pranksters!  {Well, truthfully they haven't changed. They're just taller.}

Trick-or-treaters really are SO cute and I decided to find a way to enjoy the little darlings for more than one night.  
I'd like to introduce you to my resident trick-or-treaters . . .
I made three of these little life-sized ghost when my boys were young and about the same size.  My intentions were for decoration purposes only but since everyone knew my boys, these ghost took on a life of their own . . . when guest arrived at my front door and they saw ghost inside they always thought my boys were dressed in costume and prepared to scare!

We tricked people unintentionally!  It was always a fun treat in the end.
They are super easy to make and not very expensive if you have spare materials on hand.  This was the year to finally create a 4th ghost to represent India.  I'm so glad Nolan is home - he made me one!
We even used old purple pants and glitterized girl's tennis shoes.

Supplies:
1"x 4" boards  {I used random pieces left over from a construction project.}
Screws {I used 1 5/8"}
An old pair of children's jeans / pants
Old children's shoes
Wooden dow or old pencil
Styrofoam ball
Felt
White twin size sheet
baby sized quilt batting or small, old blanket
Trick-or-treat bucket or bag
Large safety pin
Craft or hot glue

{Tips: If you don't have old jeans, shoes, or sheets at home I recommend looking for them at a garage sale or thrift shop.  I was sure to use some without much wear left so I wouldn't be wasting what others needed.
I used sizes 6x-8 jeans and 11-2 size shoes. The pants need to be wide enough to go around the board at the waist. I love the pants with elastic adjustments because they cinch up!  The shoes have to be long enough to stabilize the body.  You may choose to add weight to the front of the shoe too.}
As you see, we really used odd, old boards this time.

Suggested board measurements:
1 - Spine: 15"
2 - Legs: 20"
1 - Shoulder: 9"
1 - Hips: 9"
2 - Feet: length depends on size of shoes
1- Neck {dow rod} 7" long

Hole for dow: 1 3/4"

We also cut tapers for each ankle to allow the board to fit in the shoes.

Use 2 -3 three screws for each "joint" and 1 screw for the feet.  We also screwed the shoes on through the sole.
After you cut and assemble the boards, put on the pants and shoes.  The first time we actually put the pants on before screwing in the boards for the feet since it's easier.  However, this week we thought the assembled picture would be a better example.

Wrap the batting or small blanket  around the body but keep it at the waist {feel free to use pins to secure it but the batting actually sticks to itself really well} and add the styrofoam ball on top for a head.

Fold the sheet in half and drape it over the head and body.  I kept the sheet shorter in the front.

Cut oval shapes from the black felt and glue in place for eyes.

Pin the plastic pumpkin on the sheet at about the height of a child's hand and you have a tricky trick-or-treater!
The ever beautiful Lia!  My children have far outgrown ghost of this size but an eight year-old works perfectly.  I happen to have an eight year-old niece.  AND she loves "photo ops."
Who wouldn't want to give these kids candy??


I must make time to finish blogging my Argentine adventure.  I must make time to blog my life. 
However, I had to make time for Halloween!  I'll admit, it's a lot more fun with these ghostly residents.  
So, feel free to trick-or-treat at my house if you dare!
I'd also be thrilled to see pictures or blogs of any ghost that you might create - we'd love to have ghost cousins.


Thursday, July 21, 2011

{I'm definitely NOT superwoman}

Oh well.  I tried.  I'm definitely NOT superwoman.  Guess I should have mentioned what the boy's Eagle Scout projects will be!  If they are approved . . .

Keaton will be working with the Christian Care Center.  He met with one of my favorite {and always beautiful} women in the world . . . 

. . . he will collect food . . .

 and assemble snack kits for children.  Such a great way to help families in need with after-school snacks!


 Landon met with my friend Holly.  She's a gorgeous Army wife and . . .

. . . her husband is currently deployed.  Wow, I appreciate him.  He's the charming Sergeant on the left.

 Landon was collecting supplies so he can make neck coolers for this special Sergeant and his detachment in Iraq.  They will be home for a two week leave in the near future and Landon can meet them in person!

Wednesday, July 20, 2011

{I MIGHT be superwoman}

I'm not sure . . . but I might be.  I'm seriously looking for a cape to wear in some pictures.  Just for future reference you know.  Being superwoman is exhausting and I have very little sanity left - that's the only reason I'm slightly doubting my powers but I survived and that's saying something.  

We turned in two Eagle Scout Projects to the Boy Scout office this week for approval.  These are some of the preliminary pictures.  I just needed verification since I'm beginning to doubt myself.

I'm probably not . . . but I MIGHT be superwoman.


I want two more of these, please . . .

Thursday, July 7, 2011

{Oh, so easy ice cream "cake"}

  Homemade ice cream cakes are super yummy and so easy to make. 
My kids always ask for them on their birthdays, hot summer days, cold winter days . . . 
Honestly, the hardest part is walking back and forth to the freezer.  
I freeze mine between every step . . . exercise in advance.  Smart.  


You'll need the following ingredients:

1 half gallon of your favorite ice cream - I {heart} Blue Bell
1 jar of ice cream topping
1/4 cup of butter
12 oz. container of Cool Whip
1 pkg of Oreos

Well, not as many oreos as pictured!  I had some LARGE quantities on hand.  Extra Oreos & Cool Whip always come in handy.  Two to three "sleeves" from a large package like this or just a normal size package of Oreos will do.

Besides being easy, the best thing about homemade ice cream cakes are the options! 
My kids prefer Mint Chocolate Chip or Cookies & Cream so I use hot fudge topping.
Pecan Pralines & Cream is delicious with Carmel topping.  Of course, Chocolate Covered Stawberry ice cream is awesome with Strawberry topping . . . let me know what flavor combination you adore!  
{It will give me an excuse to make another for a taste test.}


Crush your Oreos - use a food processor if you have one or crush them the way I did during the pre-food processor college years and smash them in a Ziploc bag.


Melt your butter, mix in the Oreo crumbs and press into the bottom of a 9"x13" pan.
Pop the crust in the freezer and pull out your ice cream.


Let the ice cream soften just a little.


Go get your Oreo crust out of the freezer and cover it with scoops of ice cream.


Smooth out the ice cream and return it to the freezer.  Let it get good and frozen again.
You can go take a nap now if you'd like.  I know this has been hard on you.


Remove the lid from your ice cream topping and microwave for 30 - 45 seconds . . . just enough to soften it.  Spread it all over the ice cream and freeze it again.


Now that you can definitely find your freezer with your eyes closed . . . go get it out of the freezer again and cover it with Cool Whip.  Refreeze for a couple of hours before serving. 

If I ever had my own cooking show it would be titled, "The Distracted Chef."  I tend to wonder out of the kitchen and overly multi-task so not all my dishes turn out right.  This takes a few interrupted hours so it's perfect for me.


Melt in your mouth delicious!  
Okay, so ice cream melts anyway but it's so much better when it's melting in your mouth.


Homemade Ice Cream Cake

1 half gallon of your favorite ice cream
1 jar of ice cream topping
1/4 cup of butter
12 oz. container of Cool Whip
1 pkg of Oreos

1. Crush the Oreos, melt the butter, combine and press into the bottom of a 9"x13" pan and freeze.

2. Remove the ice cream from the freezer and allow it to soften just a little, remove the Oreo crust from the freezer and cover with scoops of ice cream.  Smooth the top and then return it to the freezer.

3. When the ice cream is throughly frozen take it out of the freezer.  Remove the lid from the ice cream topping and microwave it for 30 - 45 seconds.  You just want it to soften.  Spred it over the ice cream and then return it to the freezer.

4.  Remove it from the freezer, again, and cover it with Cool Whip.  Return it to the freeze for at least 3 hours.  Sprinkle with Oreo crumbs if desired for garnish.  

*Tip: Heat a knife by running it under hot water to make it easier to cut.


Tomorrow is the LAST day to enter my Very First Favorite Things Give-Away
Thanks to all who have entered!


Friday, April 8, 2011

{Flashback Friday}

I adore my children.  They make everyday worth waking up. 
(Being married to Sir Thomas is actually reason enough.) 
The part where my kids grow up so fast is not such a favorite.
My sweet cousin, Caroline, just welcomed baby Solomon to her precious family!  I'm so happy for them!!  He's #4 and I happen to think having 4 children is wonderful!

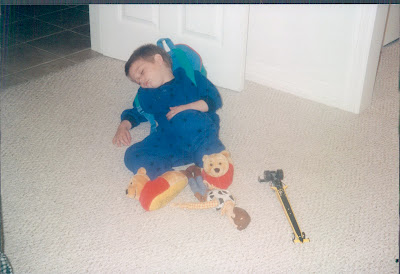
I'm so grateful for modern technology.  Having precious pictures of my children is priceless.  These pictures make me so happy.  I just wanted to look at them again - so here they are.
I have so many favorite pictures, someday I'll post more.  Looking at them makes me realize this is REAL!  It is a blessing to be a mother.  So many want the privilege and I don't want to take this journey for granted.

"A picture is worth a thousand words". . . I think it's because it would take at least that many words to describe the moment captured in the picture.


Now, they're BIG! And still oh, so handsome & beautiful.

When my crazy kids were WILD little kids . . . "knowing" adults would look at me with a bit of a scowl and warn (complete with wagging finger), 
"Just wait until their teenagers."

For the record . . . anyone with little ones, 
"Just wait until their teenagers!  It's SO much fun!"
Teenagers, at least mine, are wonderful to be around.


I love these happy memories!  We're going to make more tomorrow!

The preparations for the Birthday Ball are exciting.
I can't believe it's already here! 
I hope it's lots of fun and everyone enjoys it - that's the whole reason for hosting it.